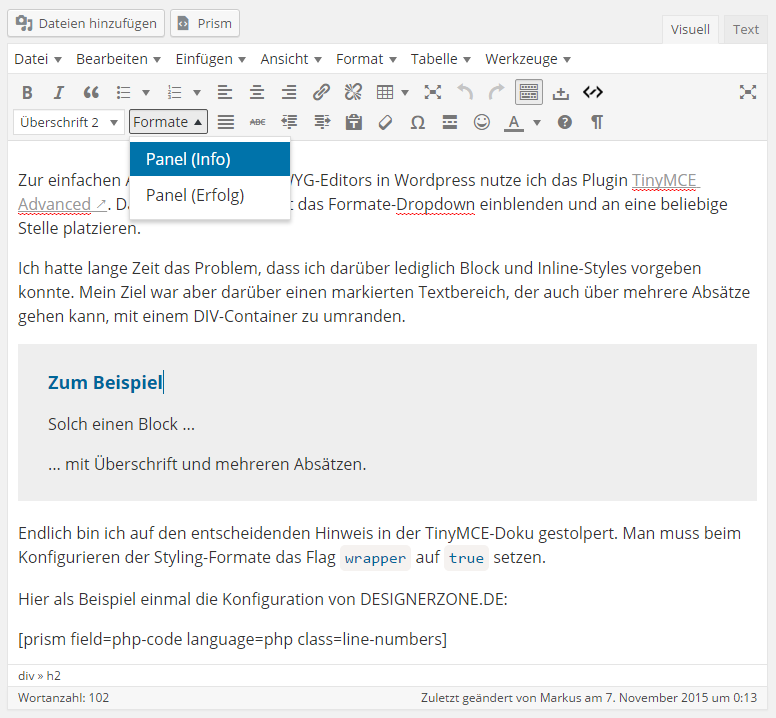
To easily customize the WYSIWYG editor in WordPress I use the plugin TinyMCE Advanced. The format drop-down can be easily displayed and placed anywhere.
For a long time I had the problem that I could only specify block and inline styles. But my goal was to use a DIV container to border a marked text area, which can also span several paragraphs.
For example
Such a block…
… with a heading and several paragraphs.
I finally stumbled upon the crucial clue in the TinyMCE documentary. You have to set the flag wrapper to true when configuring the styling formats.
Here as an example the configuration of DESIGNERZONE.DE (included in functions.php):
add_filter('tiny_mce_before_init', 'wpse3882_tiny_mce_before_init');

function wpse3882_tiny_mce_before_init($settings)
{
  $settings['theme_advanced_blockformats'] = 'p,h1,h2,h3,h4';

  $style_formats = array(
    array(
      'title' => 'Panel (Info)',
      'block' => 'div',
      'classes' => 'panel panel-info',
      'wrapper' => true
    ),
    array(
      'title' => 'Panel (Erfolg)',
      'block' => 'div',
      'classes' => 'panel panel-success',
      'wrapper' => true
    )
  );

  $settings['style_formats'] = json_encode( $style_formats );

  return $settings;
}
If you have configured the editor styles correctly, you will also get a very nice display when editing in TinyMCE. It’s almost like editing the real page. In the next picture you can see the result of the above PHP configuration.


Comments