WordPress Widgets are very inflexible and can mostly only be integrated in the footer and sidebar area. If you want to position a widget outside, the Divi-Theme offers a convenient solution. In this article we will show how you can use the Divi-Builder to integrate widgets in any position on your website without additional code.
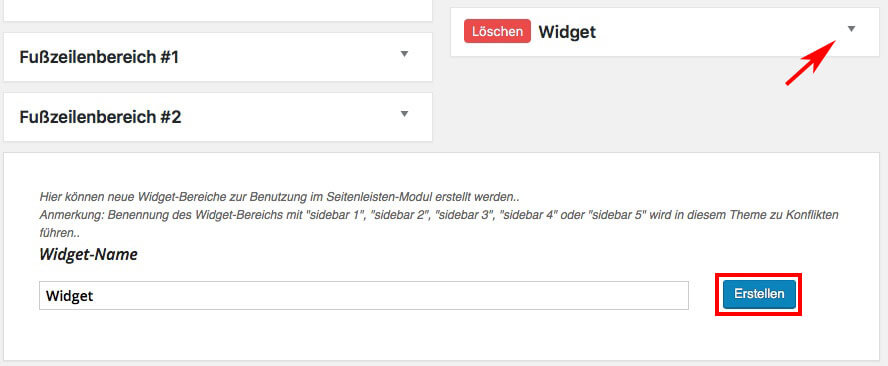
To include a widget with Divi, we first need to create a widget area. To do this, we navigate from the WordPress Dashboard to Design > Widgets. Then we enter the name of the widget area we want to create in the field on the right side of the screen. Confirm your entry by clicking on the Create button. Now we have to reload the browser window to display the new widget area. With a click on the marked arrow, the container will be opened.


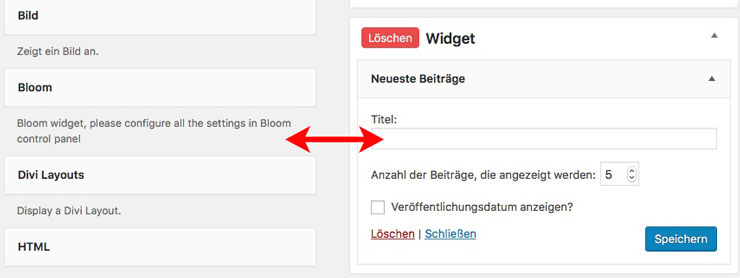
Now we can fill the widget area. On the left side you will find all available widgets. By Drag & Drop we drag the desired widgets into the container and then click on Save.


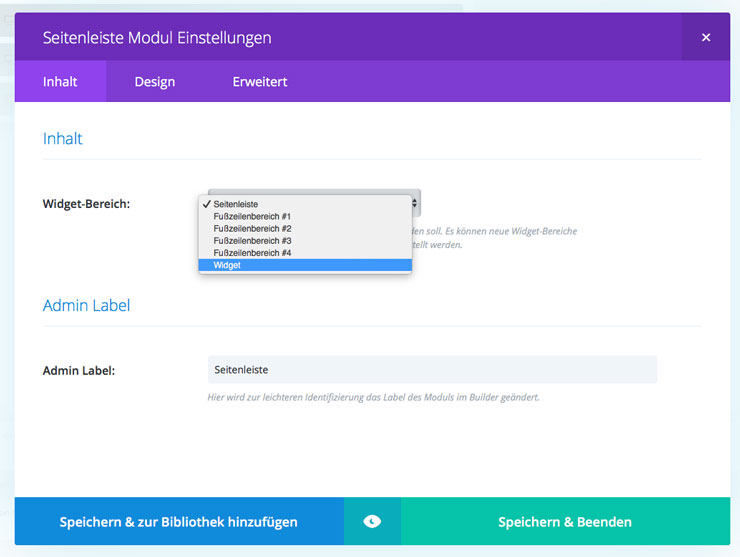
Now we can integrate the newly created section into our site. To do this, we go to the place where we want to include the widget and add a sidebar module. In the settings we select the area we created before and save the change.


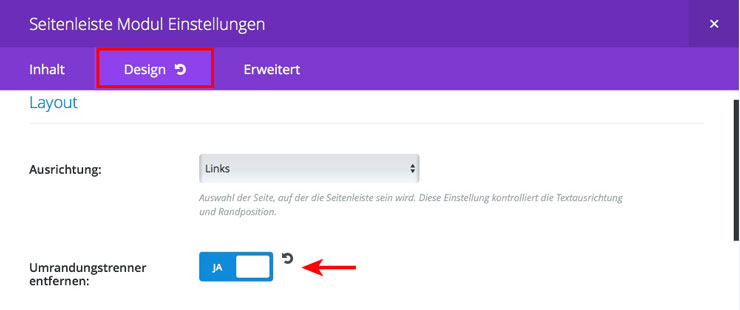
If you want, you can still change something in the design. In this example, we remove the border separator that is displayed on the left or right side by default when using the sidebar module. To remove the border separator, we go to the Design tab and click on the slide button at Remove border separator.
e.g;


Comments