If you move with the website or even rent your own (v)server, you may not receive an email notification from WordPress after moving, if you leave a comment or use the contact form.
In our case, the Divi contact form simply did not forward any more mails to us. Apparently the server blocked or disabled PHP mails for security reasons. Now you have two possibilities to fix the problem. If you are technically versed, you can check and change the settings of the server in the hope that the mails will arrive again. Or you can install a plugin so that the contact form forwards all mails as desired.
Since the first possibility is very individual depending on the server, I would like to describe the second and easier possibility in this article.
If the WordPress mails do not arrive: SMTP plugin
The plug-in Easy WP SMTP (Simple Mail Transfer Protocol) can solve the problem quickly and easily. It is free and you can find it in the WordPress Plugin directory. If you have not installed a plugin before, the following guide will help you: Installing the plugin with WordPress.
Configure Easy WP SMTP correctly
To configure Easy WP SMTP, you do not need a degree in computer science.


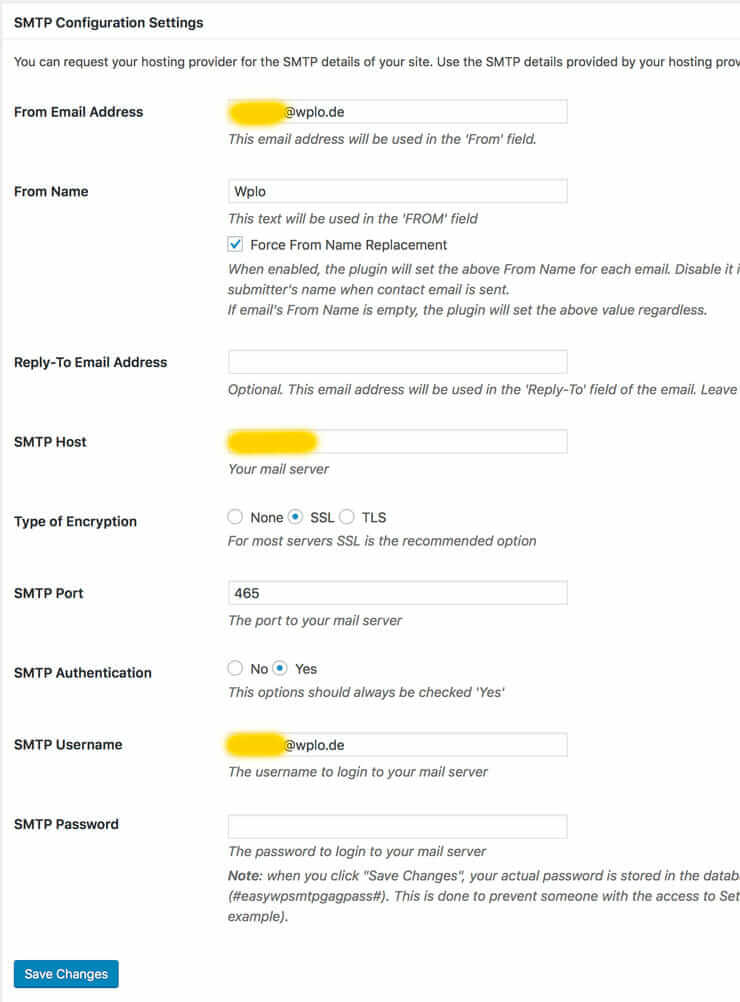
The fields are to be filled in as follows:
- From Email Address: The address to be considered as the sender
- From Name: Here is the name to be entered as sender
- SMTP Host: This field may be a bit tricky, because not everybody knows his SMTP host, but Google helps! For example Stratos SMTP Host smtp.strato.de is
- Type of Encryption: If supported, the option “SSL” is always recommended
- SMTP Port: Can also be used simply with Google. With Strato it would be port 465
- SMTP Authentication: Should be left at “Yes
- SMTP Username: Here you enter the e-mail address that you have created with your provider
- SMTP Password: And in this field you enter the password of your e-mail account
Test e-mail function
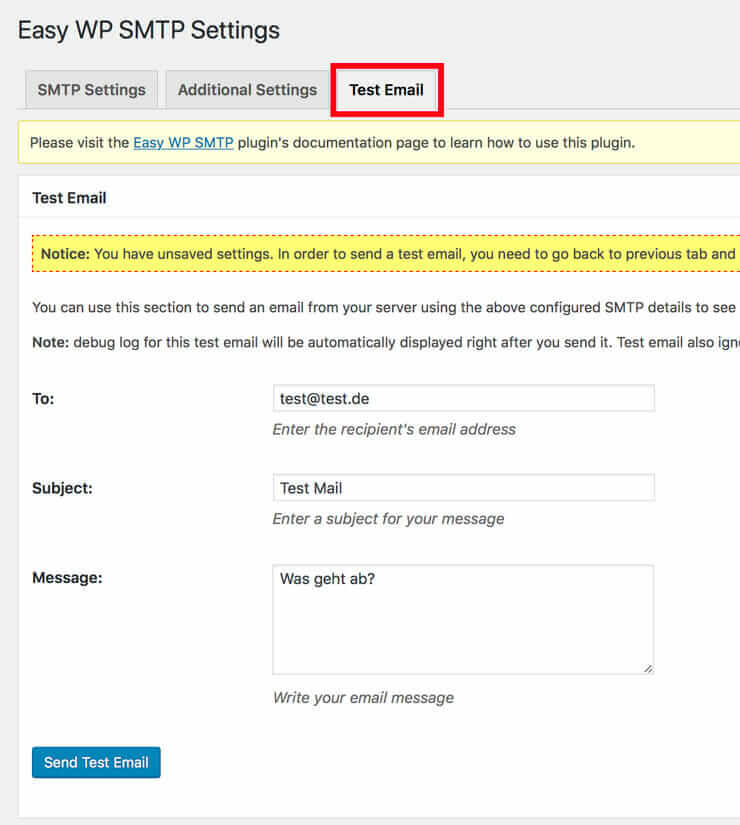
To test the functionality, you do not necessarily have to write a comment or fill out the contact form. This can be tested directly from the plugin. Just open the “Test Mail” tab and enter the data to which the test mail should be sent. If an error occurs, the plugin will inform you. If the mail arrives, then the sending should work properly again.


Now your e-mails should be coming back!
Any questions?
Suggestions for improvement or suggestions for further articles? Then use the comment function below this post!
We can also do the tutorial for you. Just send a request to adfreak!


Comments